
Our Project 5th Gen Camaro is one of the most recent entries to the Power Automedia stables. When we last left our 2010 Camaro SS, we had installed a brand-spankin’-new ProCharger i-1 supercharger system and rolled the Dynojet in the Power Automedia shop to an outstanding 600.7 horsepower and 622.0 pound-feet of torque in preparation for this portion of the build – the chassis upgrades.
The car has previously been modified with one of McLeod Racing‘s RXT twin-disc clutch assemblies, SLP‘s headers, X-pipe, and axle-back exhaust, and the aforementioned ProCharger in preparation for road-course duty.
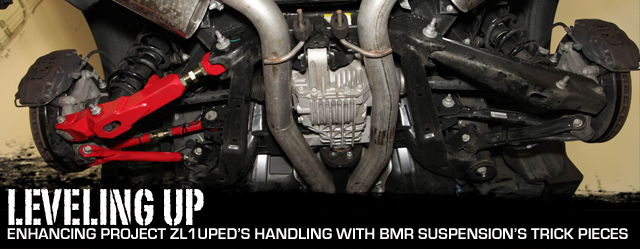
Keep in mind that this is a daily-driven car. Our goal is to make it track-worthy without completely wrecking the street manners, and that’s where the gang at BMR Suspension enters the picture. With their assistance, we’ve selected a complete lineup of parts that are designed to stiffen our Camaro’s structure, improve its handling, and retain most of the ride quality in the process.
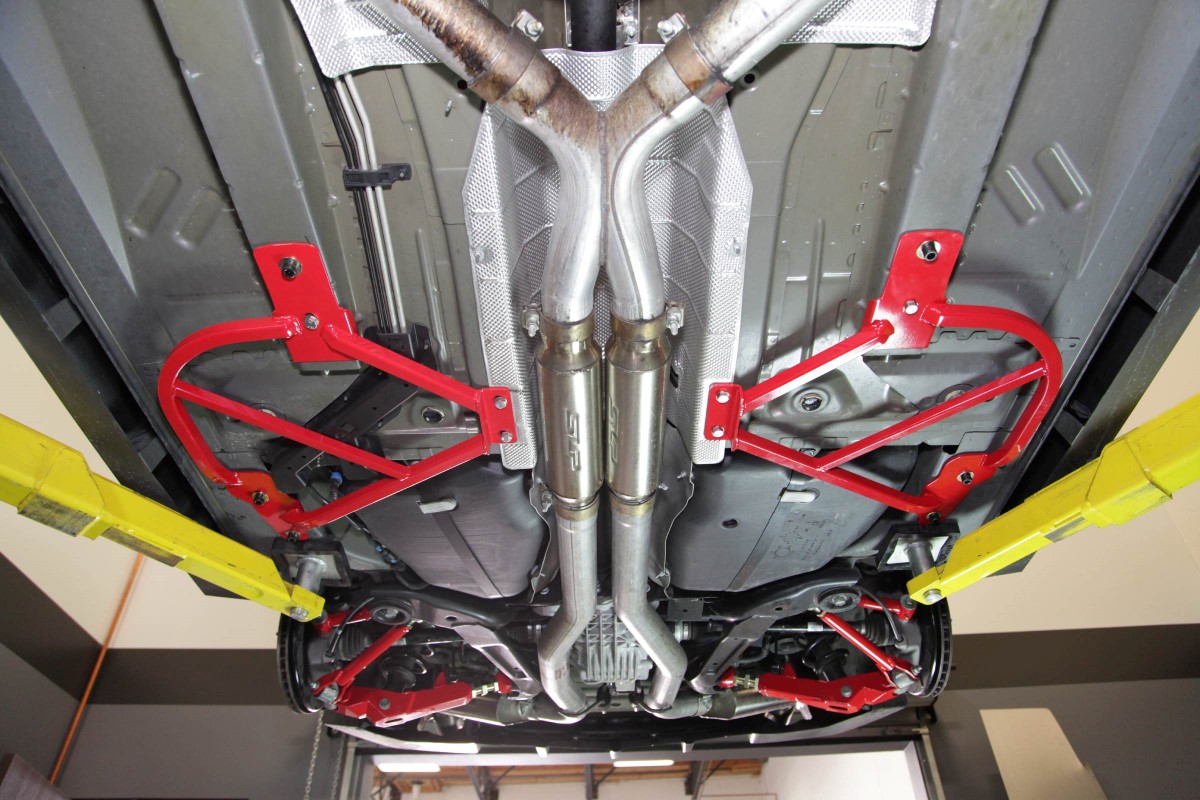
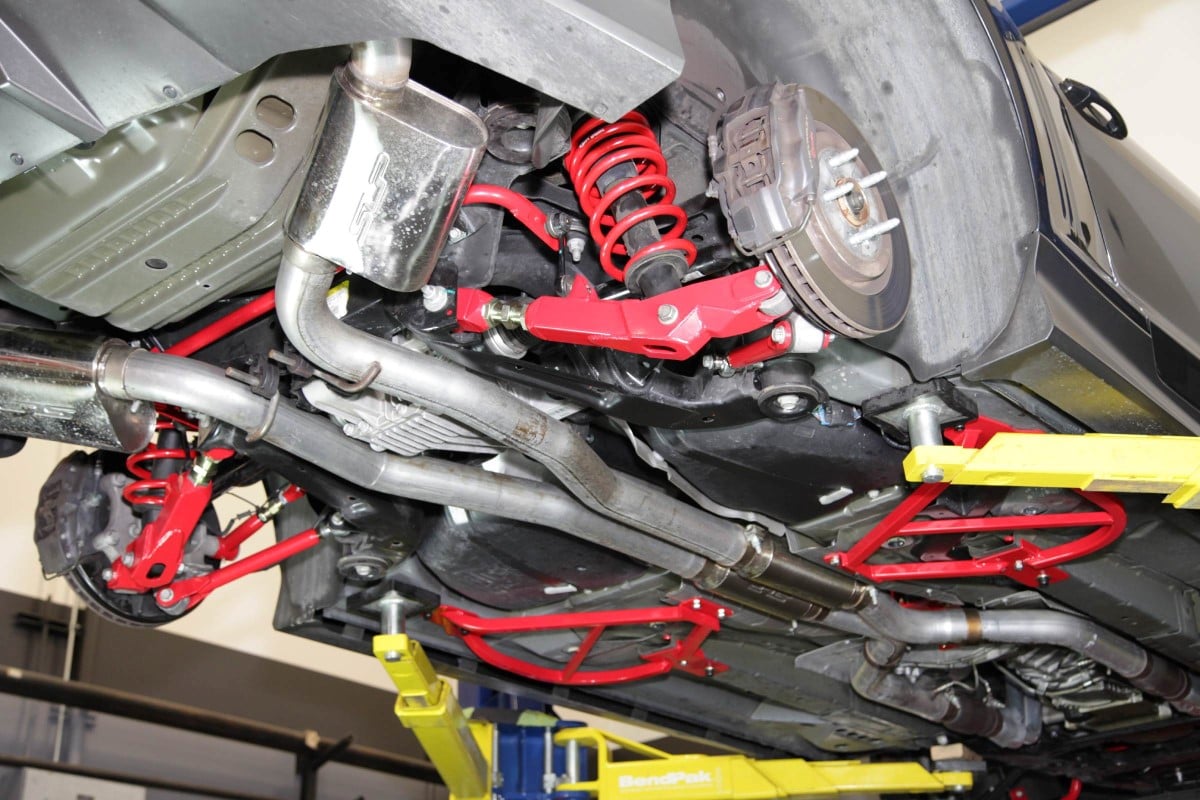
The underside of our Camaro with most of the new BMR pieces installed. Virtually every factory suspension part that’s able to be upgraded has been in our search for better performance.
Level 3 Kit Parts
We’ve got a wide assortment of items as part of this build, so let’s dive right on in. BMR’s Level 3 Handling Performance package consists of a number of items designed to take all of the slop out of your Camaro’s chassis and suspension while retaining the ride quality necessary to take the car to work every day.
“This kit is designed for your regular guy that takes the car out on the weekends and goes to the track a couple of times a year – it’s for the majority of people out there. We also have different, higher-performance versions of some of the pieces in this kit that give people options and allow us to have product available to fit any situation out there,” says BMR’s Pete Epple.
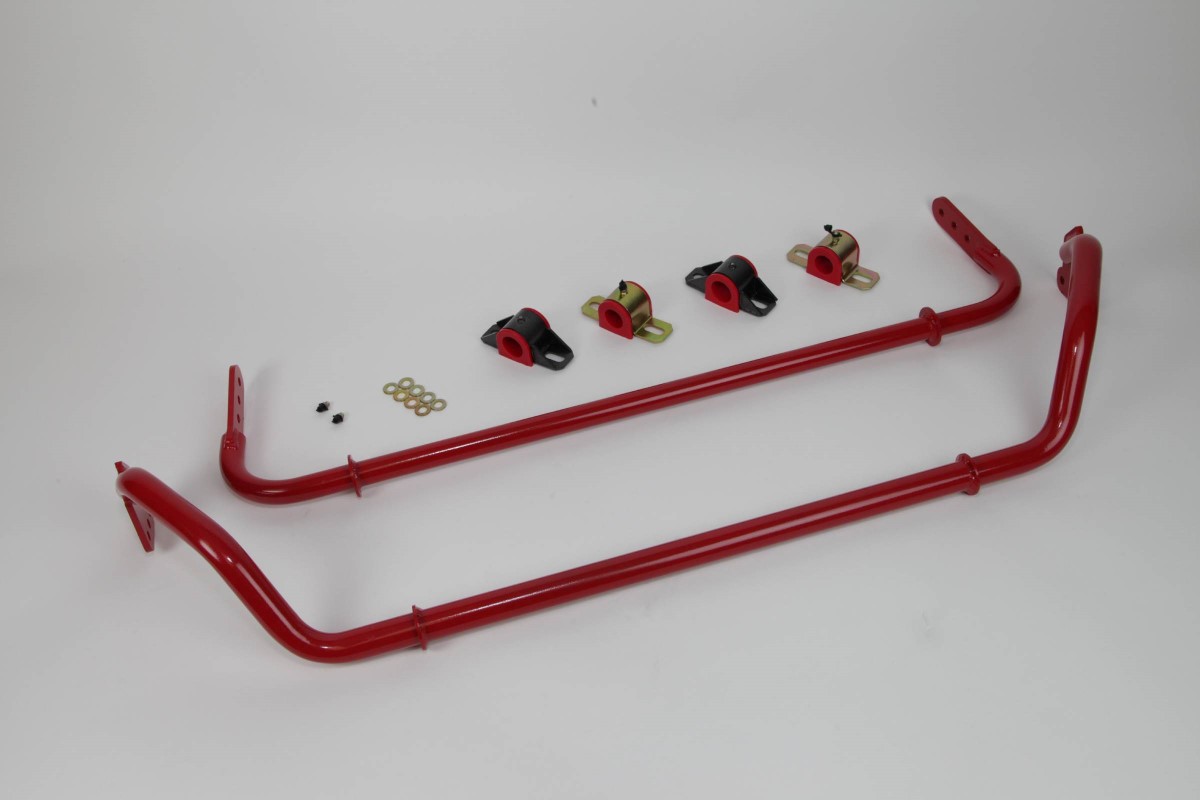
BMR’s sway bar kit allows the user to upgrade the roll stiffness substantially over stock.
Included in the kit we selected are BMR’s upgraded front 29mm and rear 25mm hollow sway bars [PN SB030] that are designed to stiffen the roll resistance to manage the car’s substantial heft much better in the twisties. These sway bars are cold-formed from tubular steel and offer three different attachment points on each bar to customize the performance to your particular driving style. The front bar offers roll-stiffness improvements from 98% to 214%, while the rear bar offers improvements ranging from 99% to 301% over the original-equipment pieces. Greasable urethane bushings are included with the bars.
Another improvement is seen with the installation of BMR’s Lowering Spring Kit [PN SP019] that drops both ends of the car one inch to take advantage of the improved roll stiffness from the sway bars. Front spring rate is pegged at 220 pounds per inch. and rear spring rate comes in at 460 pounds per inch. They are a direct replacement for the stock items and are cold-wound from chrome silicon wire before being stress-relieved, shot-peened, and computer tested.

We installed lowering springs at all four corners of the car to drop the ride height approximately one inch.
We also upgraded our handling with bushing kits from Energy Suspension. The polyurethane material that replaces the stock rubber bushing material with polyurethane specifically engineered to have a low deflection rate. Energy offers front and rear control arm bushing sets as well as two different versions of the rear subframe mount bushing kit – one that’s an insert system to stiffen the stock bushings, and another that completely replaces them.
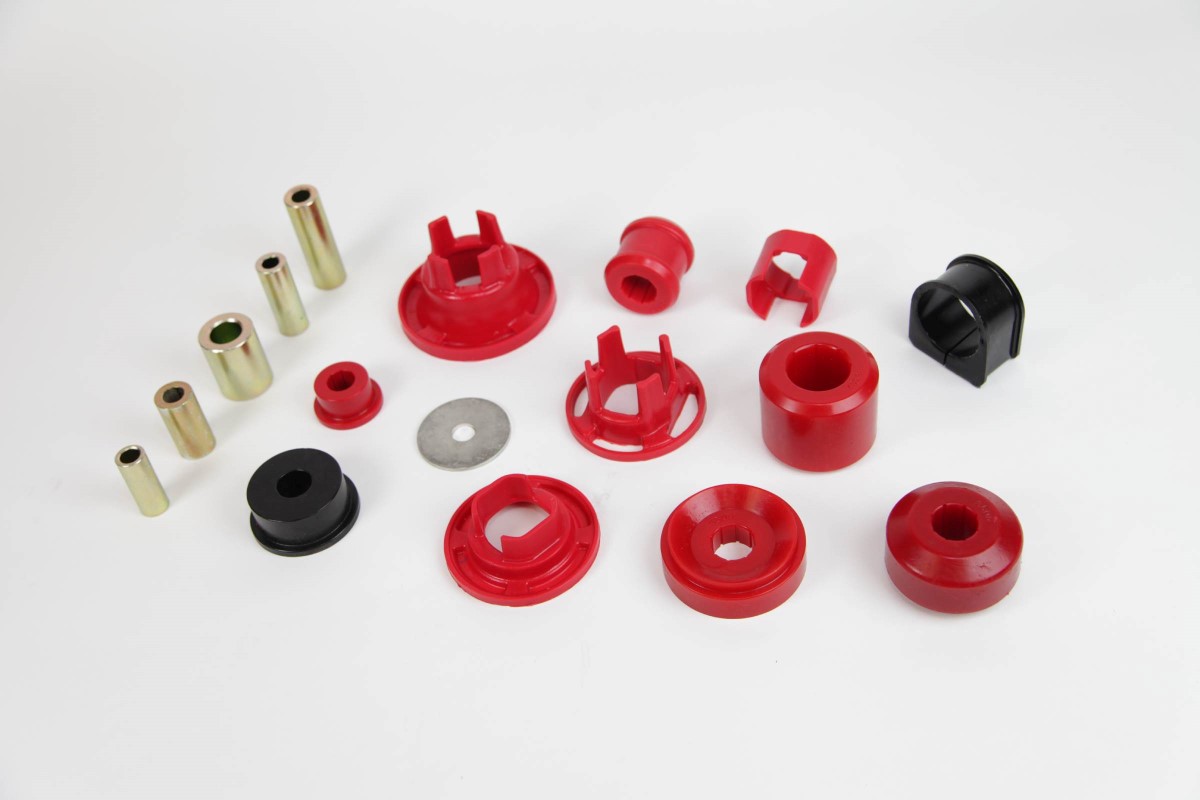
Energy Suspension polyurethane bushing kits were installed on both ends of the car, including the differential and cradle mounts to substantially improve the track performance.
Either kit will help to minimize movement and provide more support to the differential for better power transmission. The insert cradle bushings install inside the air gaps of the stock rubber bushings and don’t require removal of the cradle in the process.
“The voids in the stock cradle bushings are how GM made the suspension more compliant. These insert cradle bushings push into place to take up that void. They are simpler to install than the solid version,” says Epple.
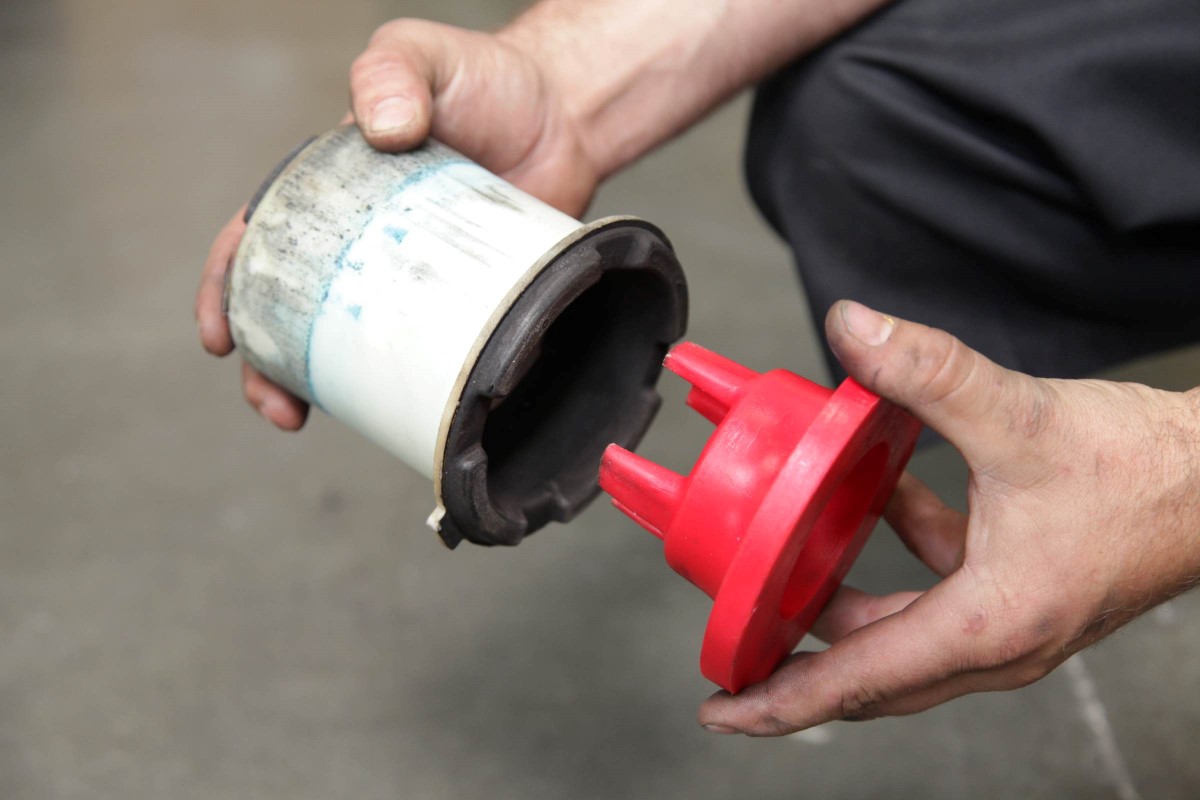
Here you can see how the new bushing inserts press into place within the stock bushing to stiffen the whole assembly.

Which Bushings Are For Me?
BMR also offers Pro and Race bushings provide an even higher level of performance than the Energy Suspension street versions offer and are targeted more towards the serious racer. Pro versions use a stiffer polyurethane while the Race option is constructed from Delrin polymer to eliminate any movement at all.
In fact, all of the bushing systems in this article are available in all three styles – Street, Pro, and Race. Check the BMR website for the correct part numbers for your application or just call and speak with one of their qualified technicians for assistance with ordering if you’re not sure what’s best for you.
The last set of bushings come in the form of the Front Suspension Bushing Kit, which includes a steering rack mount, lower control arm bushings, and front radius rod bushings. This kit is designed to reduce front suspension movement and help to maintain proper camber/caster/toe settings for proper alignment in all situations. The goal when using this kit is to produce more consistent handling abilities by removing the weak OEM rubber bushings.
Chassis stiffness is also front-and-center in the Level 3 Handling package. BMR includes a set of their bolt-on subframe connectors [PN SFC015] that are built from 1-inch x 1-inch x .120-inch wall tubing and 3/16-inch CNC laser-cut steel plates. The design triangulates the chassis using existing body-mounting holes and threaded inserts to join the front and rear subframes along with the carrier bearing location. The end result is drastically improved handling and performance with a bolt-on installation that only takes about an hour.
The last portion of the kit is the Driveshaft Tunnel Brace [PN DTB004] that uses a 1-inch x 2-inch x .083-inch-wall tube to replace the factory stamped steel tunnel brace, provides greater rigidity in the tunnel area and ties the subframe mounting points together.
Extras We Added
In addition to all of the items included in the kit, we also tackled a number of other upgrades by selecting parts in the BMR catalog to improve the Camaro’s handling. In conjunction with the tunnel brace, we also set up the car with one of BMR’s bolt-on Driveshaft Safety Loops [PN DSL014] that bolts right into place and is NHRA legal for those of you who like to drag race.
Up front, we opted to stiffen the suspension even further through the use of one of BMR’s two-point Strut Tower Braces [PN STB013], which ties the front strut towers together. It’s built from 1 3/4-inch, .120-inch wall tubing for strength and mounts to the top of the towers at the highest leverage point to offer the most stability in the twisties. BMR offers four different brace versions for different applications.

The BMR strut tower brace stiffens the front of the car considerably and stops chassis flex when it’s pushed hard into the corners.
“When you add the strut tower brace to the Level 3 Handling Kit, you’re limiting the chassis flex in the front of the car, and the same with the subframe connectors in the rear. All of these pieces work together to limit any unwanted movement, and control the suspension movement and articulation,” says Epple.
In the interest of improving performance in the rear, we selected new Lower Control Arms [PN TCA029] that perform a number of functions. Most importantly, they reduce suspension deflection and increase cornering stability. The arms are built from 2-inch square tubing and have all necessary mounting points and have the added benefit of being double-adjustable in length so you can make adjustments without removing them from the car.

The new lower control arms are double-adjustable (on the car) which will allow for adjustments both on the alignment rack and at the track.
“These cars have a lot of camber issues if you try to lower them, as the factory camber adjustment is very limited. If you lower it more than an inch or so, many customers have had issues trying to get the alignment correct. These arms have over an inch of adjustment built into them. Many of our customers lock down the factory alignment eccentrics and perform adjustments at the control arm instead,” he explains.
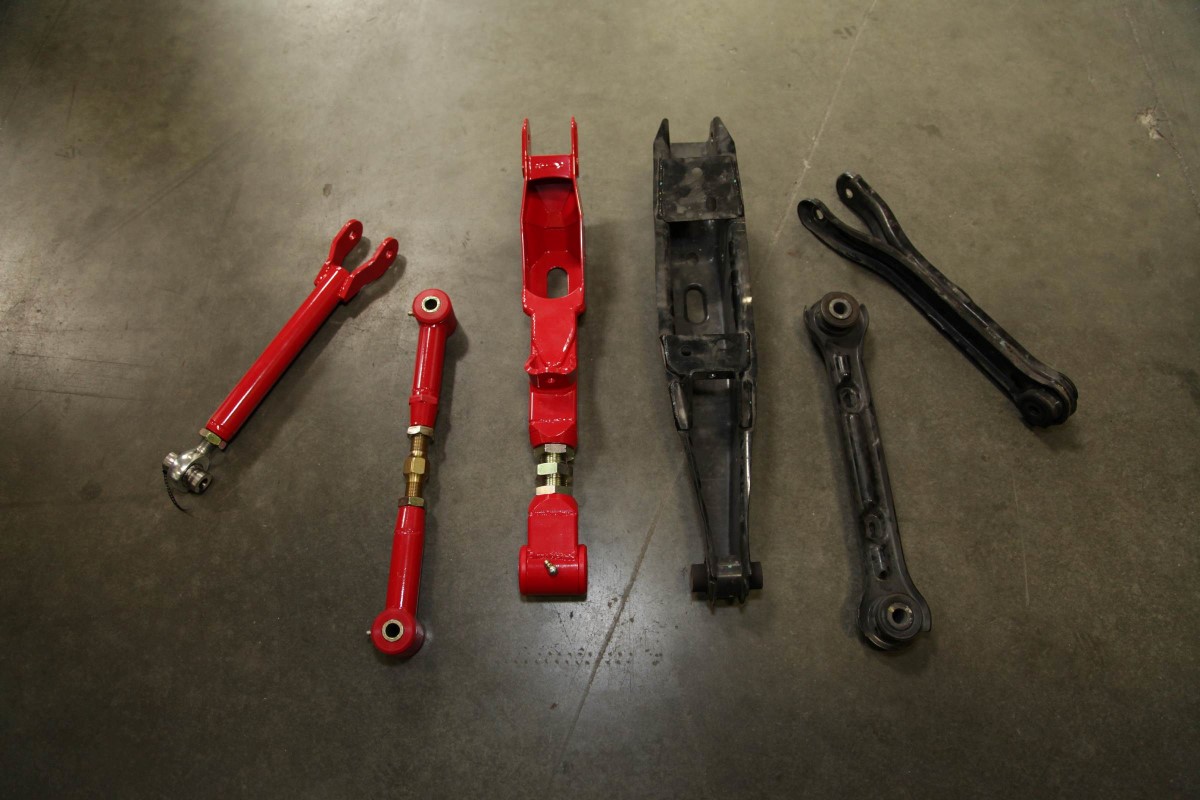
The new BMR rear suspension pieces on the left, the wimpy factory units on the right. The difference in quality and strength is highly visible – and not just because of the red powercoating!
The factory trailing arms have a serious tendency to flex, thanks to their formed-steel construction and rubber bushings, so we picked out a set of BMR’s single-adjustable tubular Trailing Arms [PN TCA033] that use 3/4-inch QA1 Teflon-lined rod ends to remove all that slop and keep the car tracking straight and true.
The last part (we’re finally here!) that we selected to top off the entire install is a pair of BMR’s adjustable toe rods [PN TR003]. Much like many of the factory suspension parts, the OEM toe rods are built from stamped steel and rubber bushings. The new BMR toe rods increase stability under high-G-load handling conditions through the use of their greasable urethane bushings that offer much greater performance than the rubber pieces we’re removing from the equation. The toe rods are double-adjustable through the use of a 3/4-inch chromoly adjuster.
All of BMR’s product line is available in either a power-coated red finish or their hammertone finish, with no difference in price. Just pick the correct part number when ordering, and soon you’ll have a boatload of shiny new parts.
There’s a huge list of parts that are going to hit the shop floor as part of this project – so let’s get started!
The Install
One of the most time-consuming parts of our install came during the installation of the various bushing kits provided in the package. There are many bushings to be replaced throughout the suspension, but the end result is well worth the time invested. We removed and replaced many items at once, and only moved to drop the rear cradle to install the differential bushings. Each of these items can be done individually if you’re doing this in steps, as funds and time permit.
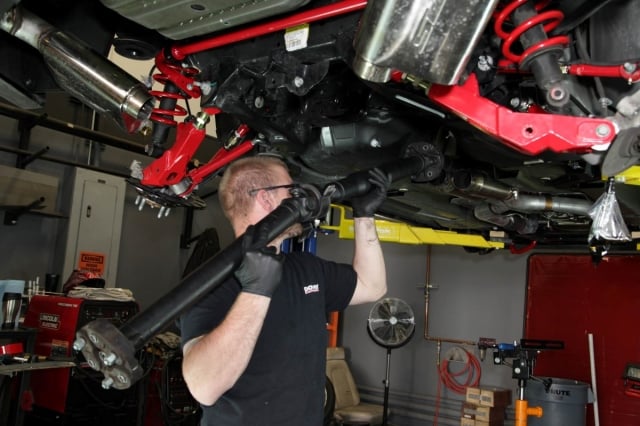
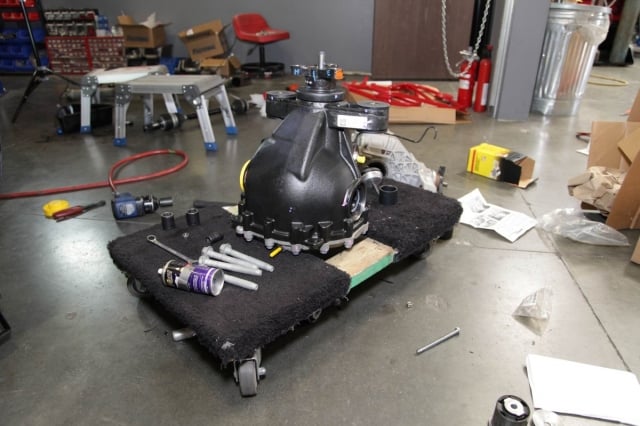
The cradle removal process is the most difficult segment of the install. Here, many hands make light work. Once the cradle was out of the car, the differential was put onto the workbench for easy access.
The removal of the cradle is too detailed to cover here, but it’s safe to say that BMR’s excellent instructions take you every step of the way. Once we had the cradle out of the car, we were able to install the differential bushings, which is a process that involves lowering the differential from the cradle, and drilling out the factory bushings. Once they’re out, you install the new bushings and re-attach the differential to the cradle.

Pulling the rear cradle out of the car is definitely a two-man job. Dean and Sean made quick work of the process. Here you can see the new springs already installed onto the struts and hanging in place as the cradle is dropped.
In order to install the rear cradle bushing kit, you need access to the tops of the bushing sleeves – achieved when the cradle is dropped. The new bushing inserts are placed into the voids of the stock bushings to take up the slack and movement. The outer trailing arm bushings replace the factory units in the rear spindle. You’ll need a bushing removal tool to get the old pieces out, then simply lube up the new ones, install the center sleeve, and reverse the process.

A press is required to knock some of the old bushings loose, so make sure you’re prepared for this step of the process.
With the cradle out of the car, it’s easier to access the upper control arms to replace the inner bushings. You’ll need to remove the upper arms from the assembly, press the old bushing out of the OE saddle, position the new bushing into the shell to match the OE orientation, then insert the sleeve and attach the assembly to the control arm.
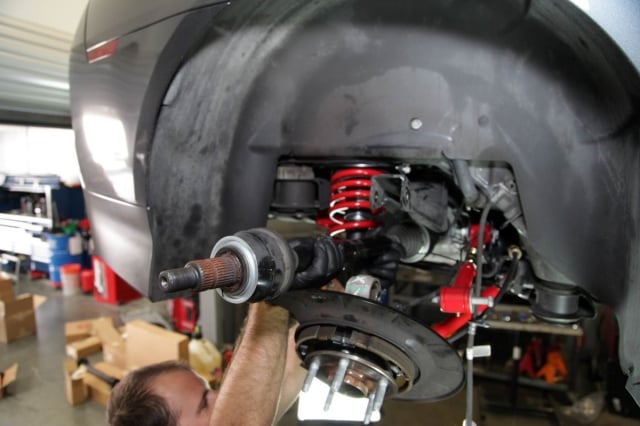
As part of our overall goal toward reducing the tendency of the heavyweight Camaro to roll entering corners, we also changed out the complete set of springs. Each strut needs to be removed as an assembly, and a spring compressor is required to compress the coils. Each spring is removed, and the new BMR pieces are installed in the reverse process before the strut is bolted back into the car. Note that an alignment will need to be completed after the springs are replaced, but since we’re replacing every part under the car we’d need one anyway.
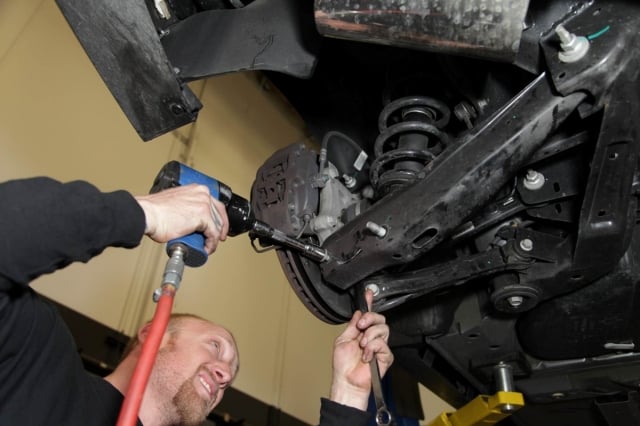
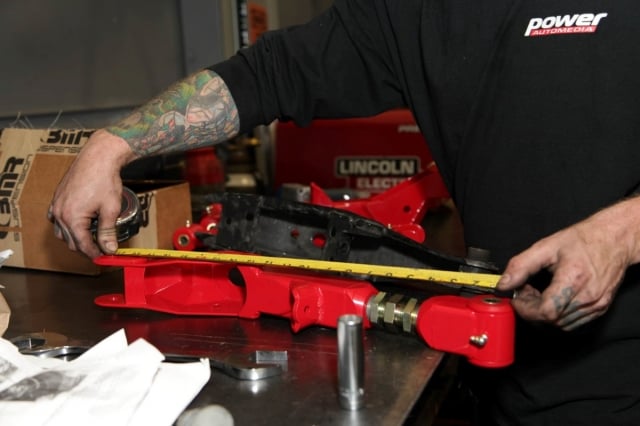
Left - Removing the factory lower control arm. Right - measuring up the control arm holes on the new arm to ensure that the center-to-center distance is equal to the factory item.
The lower control arms and trailing arms are also installed at this stage. With the rear struts out of the way, the arms simply unbolt from the cradle. Adjust the new arm to the the length of the OE lower arm to use as a starting point, and install the new pieces. The trailing arms are also a simple install – remove the factory arms, match the length, then put the new pieces back in place.
The toe rods present a little bit more difficulty, but only because you need to take care to mark the inner bolt’s position before disassembly to make sure that the alignment settings will be close upon reinstallation. Remove the bolts, match the length of the OE rod, and reinstall them using the OE hardware.
All of these pieces work together to limit any unwanted movement, and control the suspension movement and articulation. – Pete Epple, BMR Suspension

Hold the frame connector in position, start all six bolts, then tighten them down to 45 foot-pounds. Move to the other side, and the job is complete. BMR says it should take about an hour to complete the process. As part of this, we also replaced the OE driveshaft tunnel brace with our new BMR brace during installation. It simply bolts into place of the factory unit, with the factory hardware.

BMR supplies these frame inserts complete with weld-nuts for attachment of the subframe connectors.
To install the rear sway bar, disconnect the end links and the mounting brackets, pull the old one out, and install the new one following the same process. Note that each bar has multiple holes, designed to increase roll stiffness over the OE pieces – the front bar goes from 98 percent stiffer using the end hole to 214 percent stiffer in the third hole, while the rear bar ranges from 99 percent stiffer than stock to 301 percent stiffer than stock depending on hole selection. We installed ours using the middle hole in the both front and rear positions. The whole goal is to increase the roll resistance of the chassis as it loads entering a turn.
With everything complete in the rear of the car, we moved to the front of the car. The front sway bar is removed by disconnecting the links, then removing the frame mount bolts through the wheel wells. After removing the bolts that hold the mounting bushings down, you need to loosen up the motor mount retaining bolts – the engine has to be lifted approximately two inches to gain enough clearance to snake the OE bar out and the new bar in. The OE bar is rotated out to clear any obstacles, and the new bar is installed in the reverse order. We installed our new bushings at the same time.

The new cradle bushings are a three-piece system with a sleeve.
We installed the front radius rod bushings by disconnecting the outer ball joint nut, removing the inner mounting bolt, and pressing out the OE bushing with our press. The new bushing center presses into place, then the side bushings are installed, with a sleeve through the center before the rod is reinstalled. At the same time, we removed the front lower control arms to press out the OE bushings and install out new Energy Suspension pieces.
The strut tower brace was a simple install in our application – since we had to remove the struts anyway to install the springs, we were able to to access the tops of the strut towers easily to drill the new 5/16-inch mounting holes. The holes need to be deburred, then the new bolts are pushed up from underneath, the brace is set into place, and the nuts and washers are tightened down. Once the struts are back in place, install the new billet strut tower retainers on top and torque everything down as per the instructions.
The finished product from the rear of the car looking forward.
The driveshaft loop is also an easy install – support the transmission, remove the OE crossmember, mark a few holes, drill them, and bolt the stand to the crossmember. From there, install the provided spacers between the crossmember and the body, then bolt the crossmember back into place and bolt the loop section on top.

In order to install the driveshaft loop, the factory crossmember is removed and a few holes are drilled to mount the center section. The crossmember is reinstalled and the loop is subsequently bolted on.
Results
These pieces were installed over the course of a few days, so if you plan on doing this at home, make sure to allow plenty of time and a bit of patience for the process. If you have access to a lift, it’s even better and will simplify your life.
Prior to to the installation of these parts our car could round Willow Springs with 1:51 lap times, but the car owner reports that thanks to the drastically improved handling and grip, he feels like the car will see low 1:40 track times at the hands of a better driver.
“The 5th Gen is a pretty heavy car and stock it seems to have had some significant understeer when cornering at speed. Now with everything installed, the BMR setup not only improved the stance and unsightly fender gap, but made a dramatic difference in the overall handling and feel of our project SS. Confidence level is boosted, even for a novice driver who picked up 12-second lap time gains out at Willow with all of the current mods completed. After one lap you can tell it feels like this thing is on rails, taking turns a good 20 MPH faster than our first test laps with the OE suspension. Turn-in is immediate, the brake dive is greatly reduced, and the body stays much flatter during aggressive maneuvering. The kit gives a much more firm feel overall to the car, and although the new “stiff” ride comes with a slight increase in road noise, the trade-off for the improved performance is definitely worth it!” he says.
That’s the kind of improvement we can all enjoy, regardless of driving skill level.
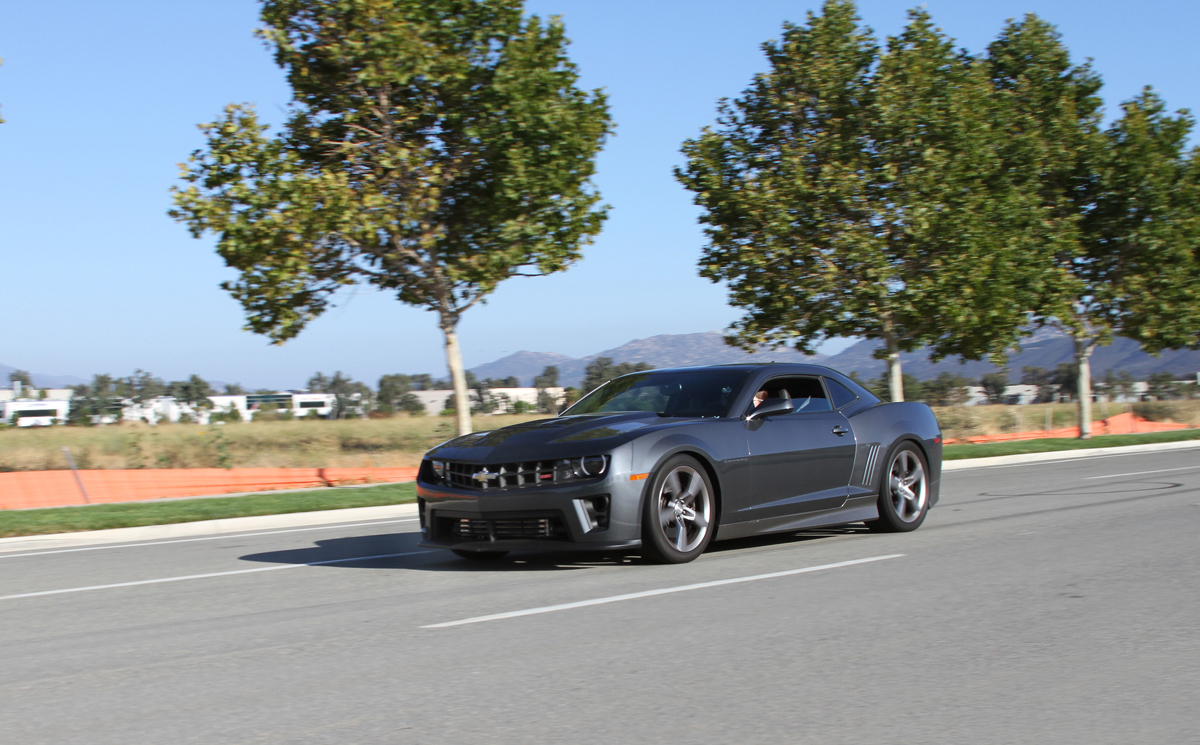
The car on the road with the new and improved lower ride height. The initial performance impression with all of our new BMR gear is nothing short of remarkable.


